Categories
Fedora Linux Oracle Linux Peoplesoft Tuning VirtualBox

Reducing PeopleSoft DPK VM Size using zerofree

One of the slightly irritating parts of the build of a VirtualBox VM using the PUM downloads is the fact that the build script copies the DPK files into the VM prior to unpacking them. The data is stored under /opt/oracle/psft/dpk which is a mount point for “disk2”. Typically this disk expands to 23GB+ during the build process as a result of this approach.

To reduce the size of the VMs, what I like to do after the VM has been built is to:

  1. Attach the disk2, disk3 and disk 4 .vmdk’s to a simple Linux server VM – I use a minimal Fedora 24 install but it doesn’t really matter just so long as the zerofree utility is installed. Note: You could install zerofree into the PeopleSoft VM and do this step using Oracle Linux, but I use a smaller Linux install as it boots quicker.
  2. Boot the VM and mount the three disks read/write
  3. Delete any large files I no longer need e.g. the DPK tgz/zip files, PeopleTools 8.53/8.54 client folders, ptengs.db
  4. Re-mount the disks read only (mount -o remount,ro /dev/sd[bcd]1 {mount-point} )
  5. Run zerofree -v /dev/sd[bcd]1 on each disk to zero the empty space created by the file deletions.

I then close down the VM, detach the .vmdk files and clone the .vmdk disk files to .vdi files using virtual media manager. This has the effect of shrinking the resulting files – essentially doing a “VBoxManage modifyhd {vdi_file} –compact“.

Once I have the .vdi versions of the files, I remove the .vmdk files from the PeopleSoft VM, add back the .vdi files, boot the PeopleSoft VM, test it and delete the original .vmdk files if everything works.

In general, this approach releases approximately 27 Gb per VM – making the resulting VMs around 30-36 Gb. Still absurdly big of course 🙂
Categories
Hardware Linux Utilities

Hardware Monitoring on Linux

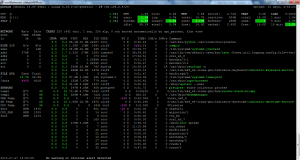
There are a few graphical applets that show hardware status on Linux, but I really like the Python based curses interface of glances. Check it out – a really clean interface, remote monitoring via the web. Obligatory screenshot:

glances_screenshot_phenom


Categories
Linux

My Linux Journey

My first Linux distribution was Slackware Linux. There were only a couple of choices back in 1993/1994 – Slackware and Yggdrasil. I distinctly remember installing Slackware from 24 3.5 inch floppy disks (these things in case you are too young to remember them). A somewhat tedious but oddly rewarding experience.

I used Slackware linux for many years, using it to build numerous SMTP servers, Usenet servers, web servers and even a point-of-presence dial-up server using an ISDN card. Slackware was, and continues to be, a very clean Linux system. You learn a lot more about Linux using Slackware than you ever will using Ubuntu or Redhat. There is a saying in the Linux world: “If you know Red Hat, you know Red Hat. If you know Slackware, you know Linux.” – certainly true in my view.

Categories
4K Ultra HD Linux Ubuntu

First Impressions – Ubuntu 15.04 and 4K

I recently added an Asus PB287Q 4K monitor to my setup. Whilst a TN panel it is a truly excellent example of one. Running under Ubuntu 15.04 with an MSI GTX 960 Twin Frozr 4GB is a really nice experience – sure you have to play around with scaling to make sure you can read the text, but that is pretty trivial to sort out. And it is so much better than Windows under the same circumstances.

Note: I have yet to try Windows 10 on a 4K monitor – I am hopeful some of the scaling issues have been resolved. If not, I’ll run it in a VM 🙂

Categories
Linux OpenSUSE VirtualBox

OpenSUSE and VirtualBox

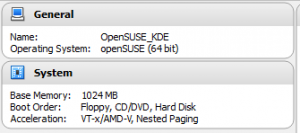
If you get errors installing OpenSUSE as a VirtualBox guest, check the memory allocated. By default VirtualBox will allocate 512MB of RAM to the VM – you need more to install OpenSUSE e.g.

OpenSUSE_VirtualBox

Note: This was an install of 13.2 with KDE


Categories
Fedora Firewalld Linux

Opening ports on Fedora Server with firewalld

Just open the port permanently using this:

sudo firewall-cmd --permanent --zone=FedoraServer --add-port={port}/{tcp|udp}

Then re-load the firewalld rules:

sudo firewall-cmd --reload

Job done 🙂